My sewing machine is older than I am and came with a brilliant instruction book which tells you all sorts of useful information. Whether you’re new to sewing, simply haven’t done something for a while or are learning a new technique, I had to share the wisdom it contains! It has so much information though that this will get split into a few posts, so for now, we’ll focus on setting your machine up for the first time (or the first time in a long while).

Setting The Machine Up
Step 1 - attach the presser foot
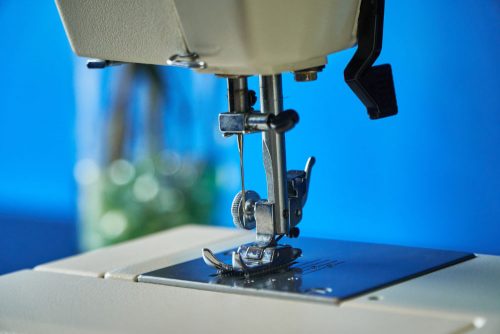
If your machine is brand new, you’ll likely need to attach the presser foot. Virtually all of these simply snap on – if you look carefully behind the foot holder, there should be a small lever. This keeps your presser foot in place. Align the bar on the top of the presser foot with the groove in the foot holder, press the lever at the back of the foot holder and gradually bring the foot holder down by using the lever to the right of the foot holder. Your presser foot should clip into place.
Step 2 - add the needle
Now you’ll need to add a needle into place. With the presser foot still down, twist your control handle (the large knob generally on the right of the machine) to raise the needle holder to its highest point. Take your needle and you’ll notice one side at the top is flat – the flat side always goes to the back. Make sure the needle holder is loosened using the nut on the side, then carefully slide your needle up into the holder as far as it will go. Tighten your nut as firmly as you can – you don’t want the needle to come loose as you’re sewing!

Step 3 - spend quality time with your bobbins, feed dogs and hook race
Next you should check your feed dogs. These are the little textured pieces under the presser foot which help to move your fabric along. If you have a machine with side loading bobbins, your feed dog controls will be in the same area, so remove your extension table and open the slide plate. Directly below the needle should be the bobbin casing and to the right there should be a lever – this controls the feed dogs. The lever might be in a slightly different place on different machines, so if you can’t see one, double check what the instructions for your machine say. Pushing the lever one way will raise the feed dogs and pushing it the other way will lower them – on my machine you pull down and to the left to drop them or down and to the right to raise them.

Step 4 - attach your spool holder
Some machines don’t have the spool holder attached when they’re in the box, so if it’s not already attached you should attach this now. You’ll know what it is as it tends to have two prongs attached to a little plate which should align with or slot into a cut out on the back of your machine to the top right. Note that some newer machines, particularly computerised ones, have the spool holder in the top of the machine and it comes already installed, so you might not need to do this step.
Step 5 - check and set your tension
If your machine has one, adjust your pressure regulator – this is the metal thing that sticks up from the top if the sewing machine directly above where your needle is. Modern computerised ones don’t tend to have this, but mechanical ones will do. Press the top down about 3/4 of the way – this is a rough standard for most fabrics; if you’re using fine materials or knits it should be 1/4 of the way down and heavier materials need it to be all the way down. You can release it back to its highest point by pressing down on the collar if you need to readjust it at any point. The pressure regulator helps with tension, so if you’re having tension problems, check your pressure regulator is set properly.

You will also have a dial on the front of your machine with numbers from 0-9 on it – this is your needle thread tension dial. Typically this is set at about 3 or 4, though some fabrics might need more tension and others might need less. If you start having problems with loops and knots on the back of your fabric, you may need to adjust your tension dial.
Your machine is now ready to run some scrap through to draw out any excess oil.
Dos and Don'ts
There’s a few safety notices to mind when using a sewing machine. Some of these may seem obvious, but even the most experienced sewists can sew through their finger if their attention lapses!
- When using your machine for the first time, put a piece of scrap material under the presser foot and run the machine without thread for a short while. Wipe away any oil which may have appeared. Likewise, when using a new fabric for the first time, run a scrap piece of that fabric through the machine in order to set the correct tensions and stitch length.
- Always be aware of the movement of the machine and don’t turn your attention away from it while using it. Even if you don’t run the needle through your fingers, you can still hurt them if the needle holder nut hits them at speed or pinches them.
- When not using the sewing machine or leaving it unattended, switch it off. My machine doesn’t have a switch so I have to pull the plug out or switch it off at the mains. You’ll save energy while also preventing any accidents should any creatures or little monsters (also known as pets and children) stand on the foot pedal.
- Do not place anything on the foot pedal, as you’ll run the risk of the machine starting inadvertently or burning the motor out.
- When servicing the machine, removing covers or changing the lamp, disconnect it entirely from mains power.
Threading the machine
Each machine has a slightly different method of running the thread through it from the spool to the needle, so double check how your machine does this. There’s also a difference with how bobbins are loaded – some are top loaded and others (like mine) are front loaded and require you to remove the extension table to access the bobbin case.

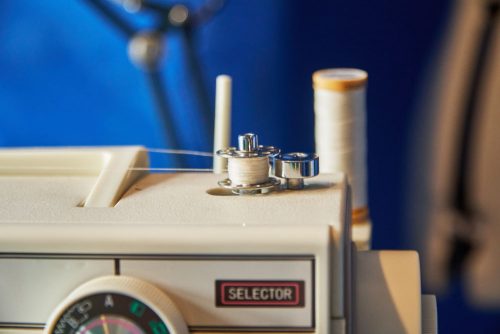
Firstly, you’ll need to wind thread onto your bobbin. Place your spool on one of the two prongs and hook the thread through the looped thread guide next to the spool holder. Wind it around the bobbin winder guide (this looks like a screw with a small plate beneath it) and back towards the right side of your machine. Pull the thread through a hole in the bobbin and place the bobbin onto the little winder spindle, keeping the hole you passed the thread through at the bottom and trapping the thread between the bobbin and the spindle. Push the spindle to the right so it’s closer to the round, flat piece of metal (this is a guide which ensures the thread winds evenly onto your bobbin) and turn on your machine. Now you’ll need to disengage the clutch – for most machines this means you turn the centre of your control handle counter-clockwise, though some computerised ones just have a button to do this. Keep winding the bobbin as much as you need or until the machine stops automatically – it will do this when the bobbin is full. Re-engage the clutch of your machine (turn the centre of your control handle clockwise or press the button) and turn it off while you remove the bobbin from the winder. Snip the thread about 5cm or so from the bobbin – you’ll need this when you load it into the case – and snip the little bit which is poking through the hole on the top of your bobbin too. Pull the winder back to the left and take the bobbin off, then unhook the thread from the bobbin winder guide (but not the thread guide next to your spindle).
This next bit is for front loading bobbins – check below for top loading bobbins.
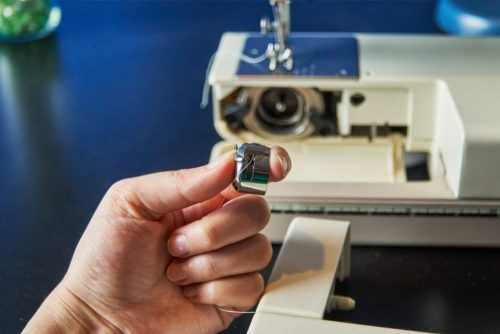
Take your bobbin and place it inside the casing – you might need to take this out of the machine if it’s brand new or been stood for some time. Take the thread you left when you cut it from the spool in your right hand and hold the casing in your left hand with the long pointed part (called the horn) just above your thumb. You should see a little slot on the right hand side of the casing – pull your thread through this and between the edge of the bobbin casing and the piece of metal attached to it. If you rotate the casing around while you do this, you’ll see the attached bit of metal (called a tension spring) ends with a little hole (called the delivery eye). You want the thread to come out of the delivery eye.

Now the bobbin is in the casing, pull the flat lever on the front of the casing to keep your bobbin in place while you load everything into your machine. If you look at the area you’re supposed to fit the bobbin casing into (called the hook race), you’ll see there’s a recess for the horn. Carefully fit your casing into place with the thread running alongside the case to the right.
For top loading bobbins – hold your bobbin so the thread runs counter clockwise and the tail is in your left hand, pointing downwards. Take the bobbin plate off your machine and carefully drop your bobbin into place. You should see a small notch on the edge of the casing closest to you – hook the thread into this notch and draw it along under the metal plate (this is your tension plate). To the left, you should have another small notch – this is your delivery eye and you want the thread to come out here. If you carefully pull your thread, the bobbin should rotate slowly counter clockwise. Replace the bobbin plate on your machine. There’s a great video by Easy Sewing For Beginners showing you exactly how to do this.

Now, you’ll need to thread your machine according to its individual instructions – once you’ve done this and threaded the needle, carefully turn your control handle to lower the needle in (or on a computerised machine, press the needle up/down button once to go down and once more to come back up). You’ll see the needle’s thread get pulled into the hook race and wind around it as the needle lowers. When drawing the needle back up, the thread should also pull your bobbin thread up and through the gap by the feed dogs in a loop. I use my seam ripper to catch the loop and carefully pull it clear of the hook race, but you could use anything long and thin, like a needle or a pencil perhaps. Now pull both the needle thread and the bobbin thread to the back of the machine – making sure the needle thread is hooked through your presser foot – and you’re ready to sew!


